Blog
The DIY Summer Tropical Flower Arrangement You’ll Wish You Knew About Sooner

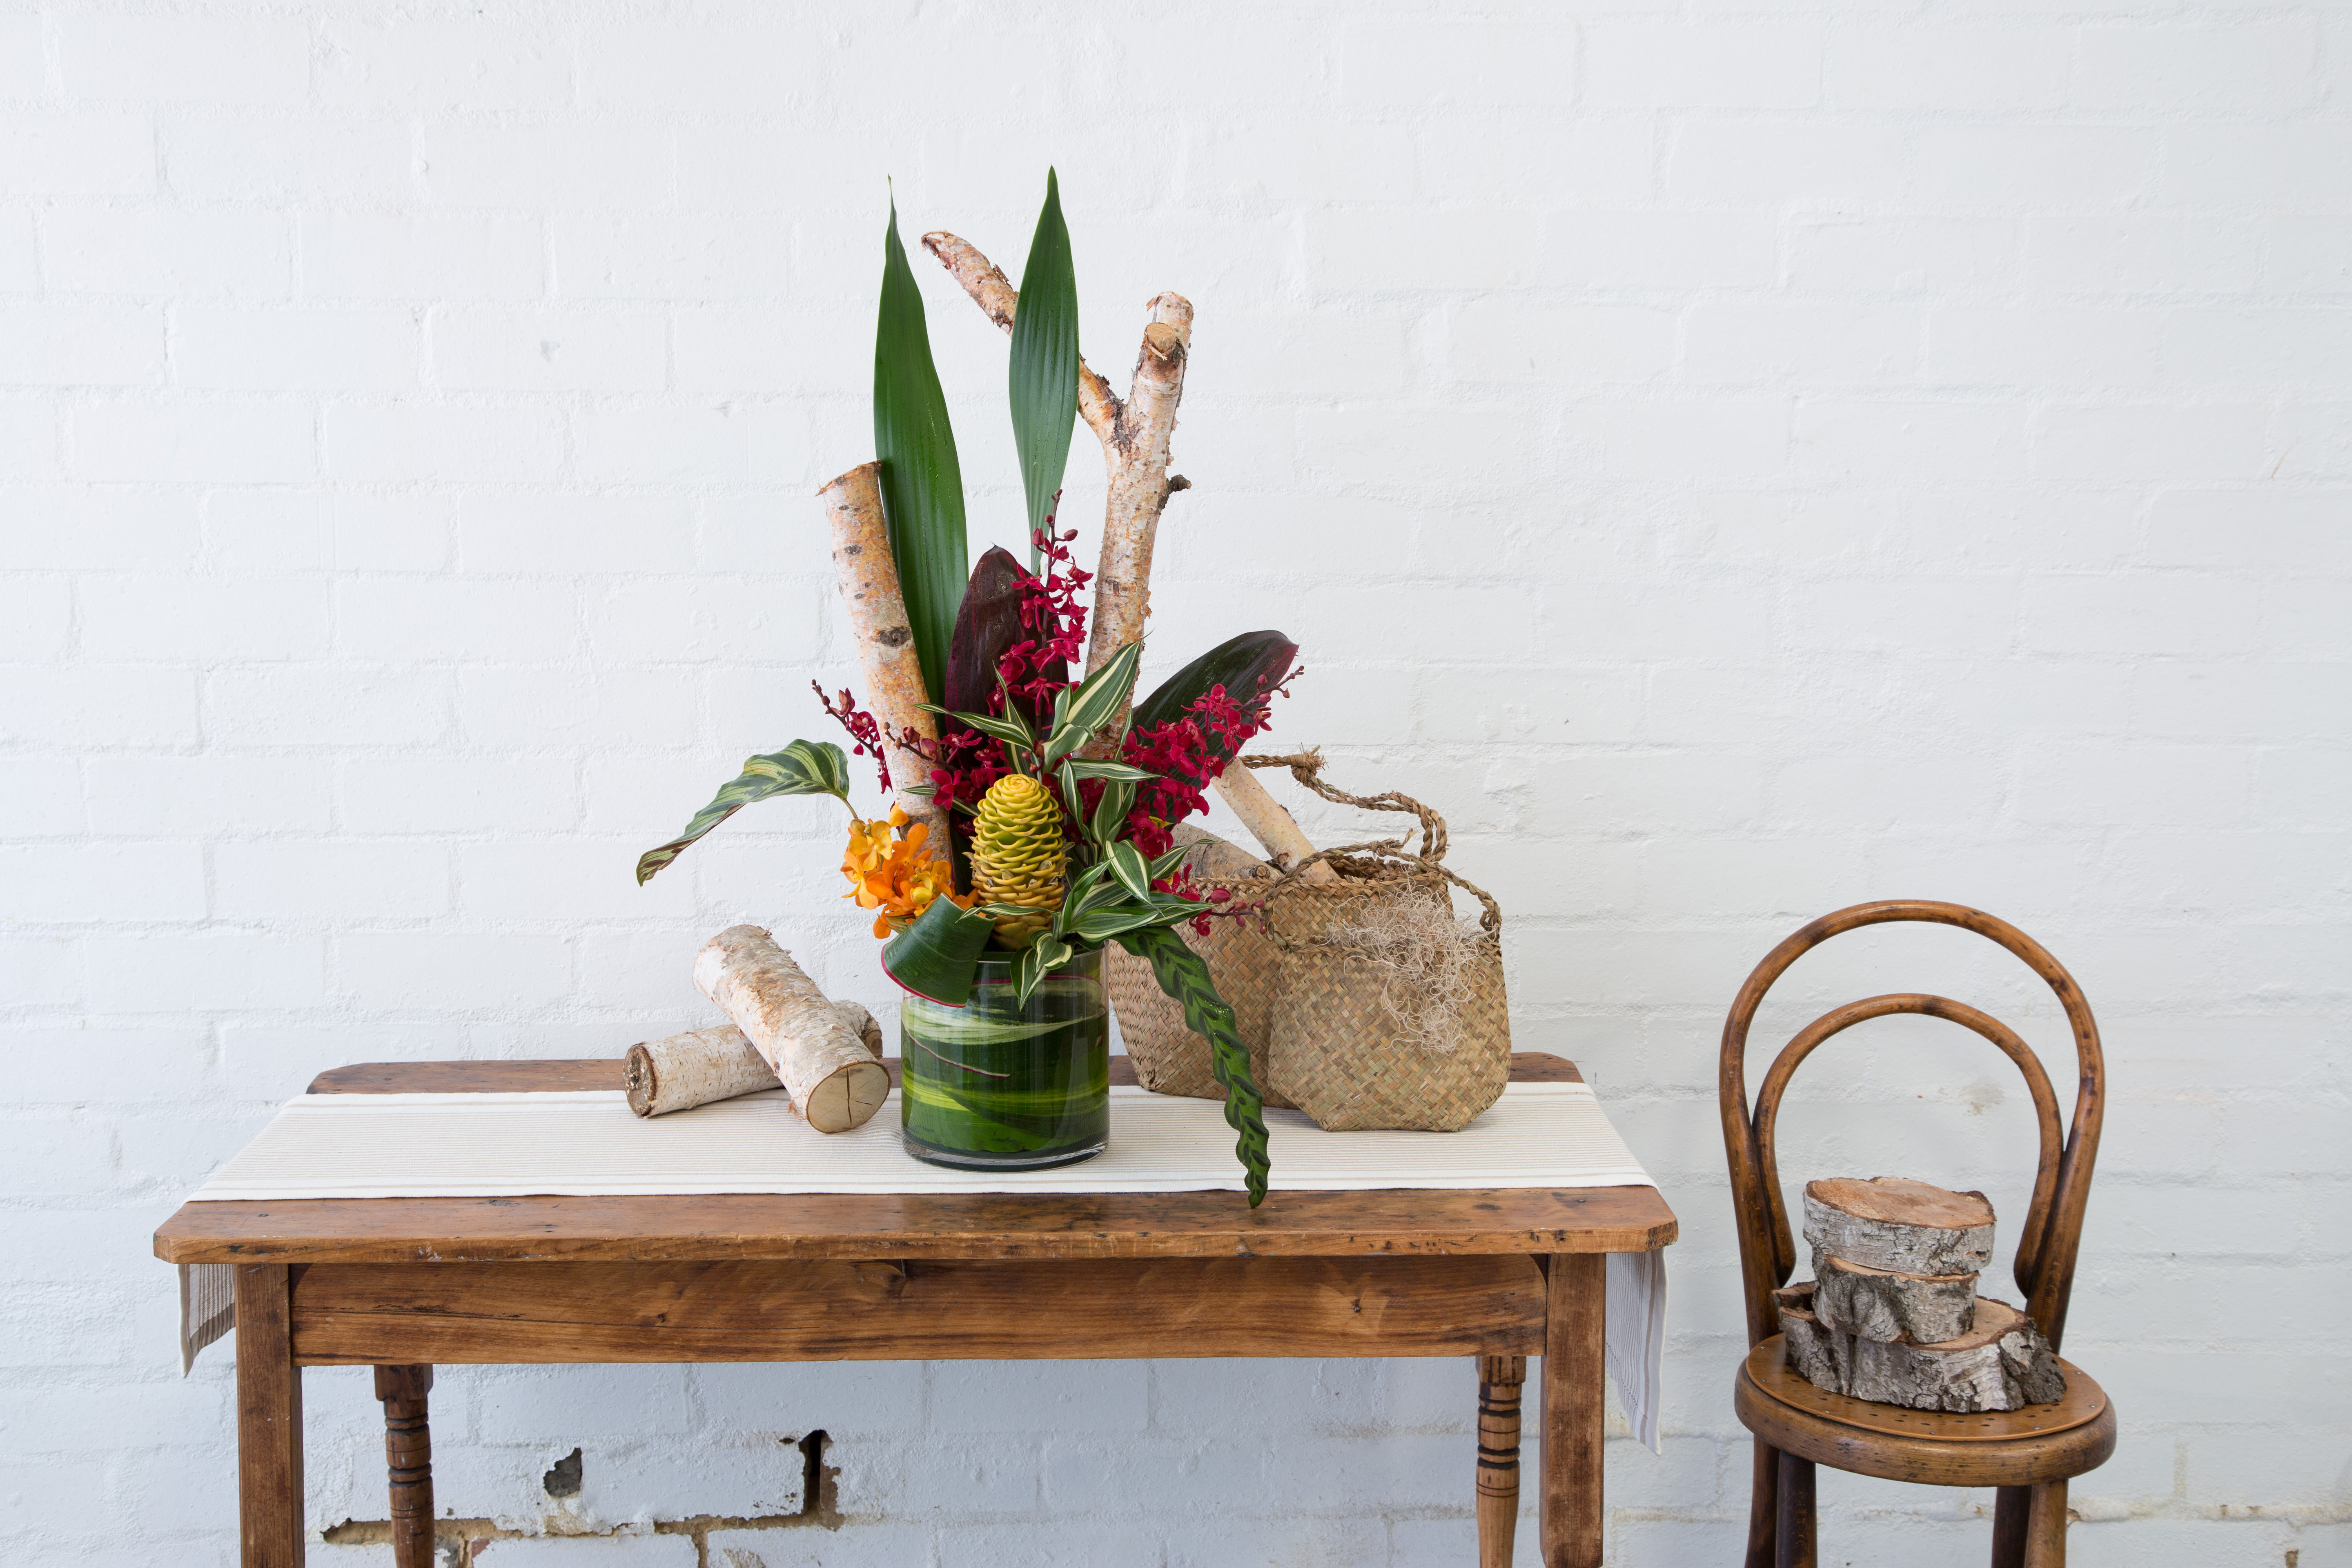
This warmer weather has got us feeling very summery, and what better way to embrace the summer vibes than with a show-stopping tropical arrangement you can make at home?
This arrangement utilises linear design – a form of presentation that is extremely useful for the display of unique, dominant flowers, as it allows the florist to emphasise a particular flower dramatically. Emphasis on negative space also enhances the lines of the materials used. The naturally occurring lines formed by the flowers, leaves and branches create a remarkable linear effect!
So, what are we waiting for? Let’s get into your next go-to tropical arrangement you’ll be pulling out all summer long to impress your house guests.
Ingredients
- Singapore Orchids
- 5 x stems Mixed Tropical Leaves
- 1 x bunch Mini Cordyline tops (additional foliage)
- 2-6 Sticks (we like Silver Birch)
- Ginger Flower
- A handful of Moss
- Tatami Matting (optional)
Tools
- Basics Tool Kit – floristry snips, secateurs, towel, apron, gloves
- Glass vase container
- 1/3 brick floral foam or chicken wire for a more sustainable method
Design Steps
- If you are using foam, begin by soaking 1/2 of a floral foam brick. Soak fully submerged for at least 30 seconds.
- Place the foam into the container with the branding facing upwards.
- Within this design, we have three areas. They are:
- the active area, which is the height
- the passive or base area, which the lowest point
- the transitional area, which is the area that sits between, and links, the active and passive areas
- Begin by placing the sticks into the active area. Insert a minimum of two sticks, one on each side of the foam, towards the back of the foam. The number of sticks you use will depend on their thickness. The thinner the sticks the more you’ll need to use to achieve good proportion.
- Build the Tatami Matting and place it in the arrangement, centred between the sticks, or over the vase’s edge.
- Now place two of the straightest tropical leaves at different heights and depths between the sticks. The active area is now complete!
- Choose two matching tropical leaves and place them into the transitional area so they are pushed out to one side.
- Move down to the arrangement’s passive area. Place a few flat leaves on suitable angles into the outer edges of the foam so some leaves sit horizontally and some cascade over the container.
- Set two taller tropical leaves aside and use all the remaining tropical leaves in this base area.
- Place the ginger into the base area. For maximum effect place them near one another, if you are using more than one.
- Move back up to the transitional area and place two Mini Cordyline tops at different heights and depths.
- Place the Singapore Orchids at different heights in the passive area.
- Use the remaining two tropical leaves at the back of the arrangement. They should be inserted at different heights and depths and the front of the leaves should face the front of the arrangement. These leaves add depth and prevent the arrangement from having a flat-back look.
- Cover any exposed foam and or chicken wire with moss.
Tips:
- Less is more in this design.
- Fill your arrangement with water daily.
- Add fruit or vegetables to this design to add interest.
We can’t wait to see how your tropical arrangement turns out! Make sure to tag @bloomcollege on Instagram and Facebook so we can share your creation with fellow flower lovers.
This super simple tropical arrangement is one of the designs featured in our brand-new e-book, Flower Basics. This e-book is entirely free, so we hope you get a lot out of it! For free access simply sign up to receive our monthly budders club news – SIGN UP NOW