Tag Archives: florist

Career Change spotlight – From Nuclear Medicine to flowers

MEET CATHERINE MC GRATH,

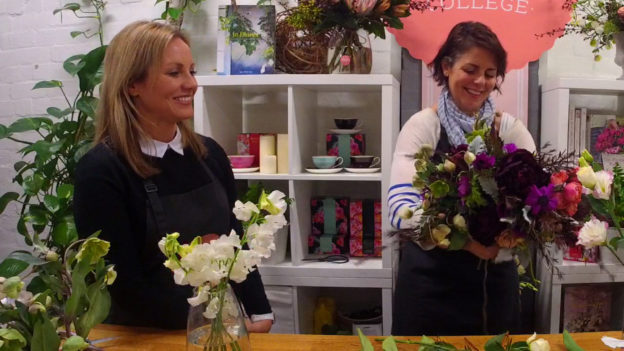
Catherine joined the Bloom College Career Change Course in March 2017 and has been creating beautiful results. Here’s an insight into Catherine’s journey so far. You can follow her on social media to watch her progression into her new career.

Before studying floristry I had been a Nuclear Medicine Technologist at the Alfred Hospital for about 12 years.

I’m a mum of 3 (6yrs, 2yrs & 1yr old), I have been living in Point Cook for 10yrs now & living in Melbourne for 17yrs. I grew up in a very small rural town called Gerangamete – in between Colac and Apollo Bay. My parents house is on acreage and my mum was always a very keen gardener, so I was lucky enough to have grown up surrounded by a large garden and lots of flowers! My mum has also been an amazing cake decorator for as long as I can remember – her cakes with icing & fresh flowers have always been an inspiration for me, its fair to say that my family have always been on the arty side. I had always loved art subjects throughout high school, but changed in a science direction when going to Uni. Having been down the science path & no longer being so happy to go into my job everyday – I had just felt the need to get back to my creative side, so after a few years of thinking about it, I decided to make the change. The thought of working with flowers everyday just makes me very happy!

I first looked into Bloom College as I was originally planning to study in Geelong – upon looking into the course, it looked great & just felt like the right fit for me.

Eventually I would like to have a floristry business of my own, However until the kids are all in school I will probably look at working in a shop or for someone else whilst I build up my confidence and floristry knowledge – I’d like to feel like I have a really solid base before jumping in on my own. I also don’t think that I could fully commit to my own business until the kids are all at school.

I love bits and pieces of lots of different floristry styles, so haven’t settled into my own yet & am still very open to the direction that I will take – I’m hoping that that will all just fall into place when its right!

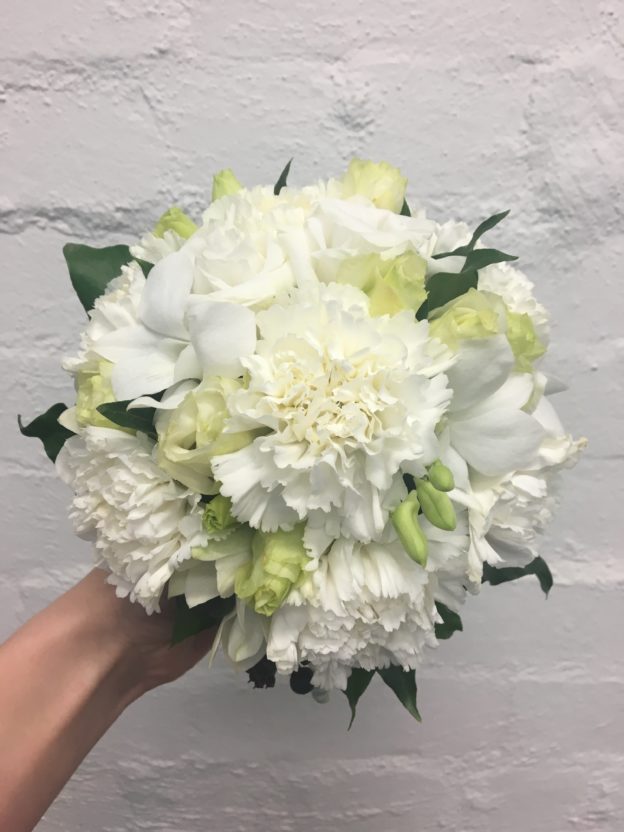
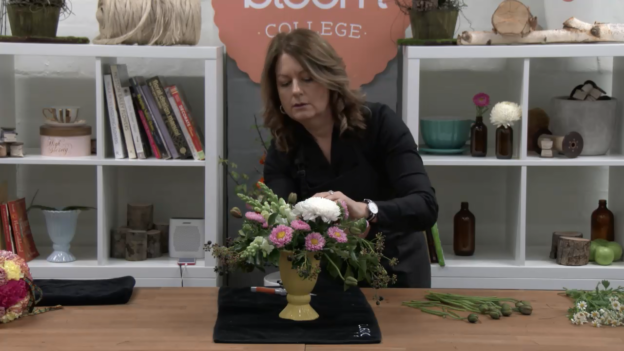
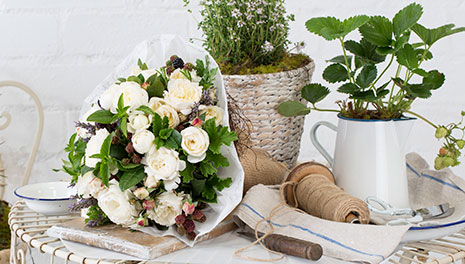
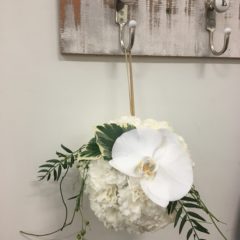
Some more of Catherine’s beautiful work so far;


INSTAGRAM: cath81mcgrath

FACEBOOK: Catherine McGrath

Email: catherinegarraway@hotmail.com


Make a professional Glass Fish Bowl Terrarium

Filmed Live at our Career Change course in Port Melbourne, learn how a professional florist designs and constructs a Glass Fish Bowl Terrarium.

For more arrangement demos, recipe cards and other flower arranging advice, visit www.bloomonline.com.au

Before you start making this arrangement, be sure to watch the video carefully and consider what materials you want to use to make your own terrarium. There are so many different designs, plants and ornaments that would great in a glass plant terrarium so be creative and experiment!

Fish Bowl Terrarium

Urn Flower Arrangement Demo and Recipe Card

Learn how to design and create a stunning urn flower arrangement for the hobbyist or professional florist, with this demonstration filmed as part of our live training course. You can download the recipe card (including alternate flowers to use) below…

Urn Flower Arrangement

Bouquet flower basics course

Posy bouquets

Posies are one of the most traditional floral arrangements. They have been used since at least medieval times when they were carried to disguise the unpleasant smells of the era. In particular the brides who carried them. Their popularity is timeless, no doubt due to the versatility of their use and the varied materials that can be used to create them.

A herb and rose posy is a perfect last-minute gift or the solution to the situation you find yourself in when you spontaneously want to make something. All the resources required for this arrangement are usually found within neighbourhood homes, gardens or local stores.

Posy DIY recipe

Ingredients:

  • David Austin rose – white, 10 stems
  • Lavender – 1 bunch
  • Lemon scented geranium – 1 bunch
  • Mint – 1 bunch
  • Basil – 1 bunch
  • Rosemary – 1 bunch
  • Berries – 1 bunch
  • Parsley – 1 bunch

Tip-

Use any herbs that are in season: the more you cut your herbs the better they will grow.

Accessories:

  • Baking paper
  • Twine
  • Hessian or similar
  • Birds nest wire frame (optional use as shown in video)

Tools:

  • Basics pack
  • Paper cutting scissors
  • Grey lead pencil
  •  how to make a posy

Construction Steps:

  1. Choose and cut your botanical materials. For this posy, have your stems at approximately 20–25cm. Begin by removing all the lower leaves. Then place each different material into a separate container.
  2. Once all the lower material has been removed, create the posy’s junction point in the web of your left hand (for right-handed people) or right hand (for left-handed people), holding your first finger and thumb as shown in the video. Remember: your thumb is the gatekeeper that allows stems to enter.
  1. Begin with the geranium or, if you have chosen different herbs, use the herb with the strongest stems. One by one, place the stems into the junction area, bringing the foliage of the geranium down close to sit on the top of your hand, as shown in the video on our app.
  1. Set aside 6–8 of your shortest stems of herbs to use after you have added the roses to the posy, and set aside all the lavender and berries.
  2. Add the remaining herbs to the posy. Use your free hand to turn the posy after every couple of additions, as shown in the video. This will help your posy get a nice, round shape.
  1. Take a stem of David Austin rose and place into the centre of the base you have created from your herb stems. Protect rose stems by resting them on the other foliage, held by your thumb, as shown in the video. Do not attempt to place rose stems into the junction point.
  1. Add three berry stems to the posy, making sure they are evenly spaced around the top of the herb base.
  2. Repeat the above step using three rose stems so that berries and roses alternate around the top of the posy.
  1. Disperse the remaining berries evenly throughout the forming posy.
  2. Disperse the remaining roses evenly throughout the forming posy.
  3. Distribute the lavender throughout the posy.
  4. Place the remaining shorter stems of herb foliage evenly around the edge of the posy.
  1. Check that all flower heads are placed evenly. Hold the posy as far from your body as you can and check that you have arrived at an even dome shape.
  2. Once you are pleased with the shape, tie the stems together at the junction point.
  3. Trim all the stems to the same length approximately 10cm from junction point, then place the posy in a vase.
  1. Whilst your posy is having a lovely drink, you can prepare the baking paper for the wrapping. Use about 1m of paper. Write on it, personalise it and frill it as shown in the video.
  1. Add the posy to your wrapping, tie the wrapping, add a birds nest if you want to, and finish off with a square of hessian around the stems to complete your work.

To watch video demonstration on the construction of this posy download the app or join a beginners workshop or course

Posy DIY how toHow to make a posy